Tuesday, February 15, 2011


Since it's been such a long time since I've blogged, I'll post a bunch of cute pictures, some recent updates, and some Valentines day fun. 

Em's latest words: good girl "gugal," clean (she likes to wipe her face and ours as she says this), sticker, color (for crayons), toe, pocket "pah," cheese, grandma/grandpa (this is one word - "gmagmpa"), tickle, poke, go, kitty "kiyee," gentle "genta," close (loves to close the cupboard drawers/dryer/etc), and her first two-word phrase, "bye bye dada."

Here are some random cute pictures...

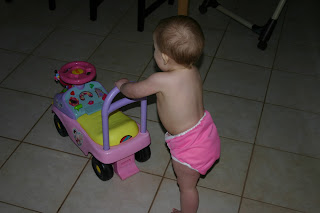
 She loves driving her car all over the house!
 And pushing it. :)

 And pushing her other toy...
 One of her other activities...putting on and off mittens and slippers/shoes.
 These ones are a little big!
 She recently learned how to get into three of the kitchen drawers.
 She loves putting on her boots. Don't ask what she's wearing!!

On Valentine's day I thought it'd be fun to let Em do her first painting and make some Valentine's to give daddy when he got home from work. I made some rice krispie treats while Em made a pretty mess. :)
 We started with some coloring...
 Then we filled a bin with some paint, jellybeans, and paper hearts and let Em shake it up to make some more pretty artwork.
 Then we got out the paints and let the fingers do the rest. This got pretty messy...
 As you can see!
Bath time after that!
 Showing daddy her toes after he got home from work and she got out of the bath.
 Fun with heart stickers.
 Not walking by herself yet, but standing for a while.
 So cute. :)

After Emery went to bed for the night, Dustin and I got all dressed up for our "date." Dustin made me put on a dress and he lit the house in candles and prepared some T-bone steaks!

Yum! T-bone steaks, garlic mashed potatoes, and asparagus. What a great Valentine's day!

And Emery's artwork drying overnight. :)

Wednesday, February 2, 2011

Simple Bib Tutorial


I love creating things with my hands, whether it's with paint brushes, pencils, charcoal, a needle and thread, or knitting needles. There is some kind of satisfaction when you look at your finished project and know that not long ago it was just scraps, just a ball of yarn, or a couple tubes of paint. To know that with a little hard work and persistence something can be created from only a few meager supplies. 

I am definitely not an expert at any art, and I don’t like following patterns, but I grew up doing crafts with my mom, sisters and aunts and going to craft shows and fairs to sell our creations, so it has always been a joy to sit down and make something. The simpler projects are the most fun because you usually have instant gratification with a finished project to use or admire.

Since Emery was in need of a couple new bibs, I decided to use some scrap fabric I had to make her some. Here are some simple instructions for the bib.


What you’ll need:

-A bib you already own to use as a template
-Cotton fabric (14”X18” for the small bib, 16”X24” for larger bib) I used two flannel blankets I purchased from a garage sale last summer
-Terry cloth (same dimensions as above)
-Scissors
-Sewing machine or serger
-Velcro or snaps with a snap press/pliers
-Pins


Instructions:

Start by laying out your fabric (right side up) that you’ll use for the front of your bib and draping the template bib on top of it. Cut 1/2 inch around the edges of your template bib. Do the same with your terry cloth but with the right side down.


Next:
Cut out a “food catcher” flap for the front of your bib. The dimensions of this can be whatever you’d like. Mine was 4” tall.

 This is what I mean by "food catcher" flap :)

Next:
Sew (tuck under the top part) the top edge of the food flap. Or serge directly over it without tucking it under.

 Tuck it under and sew over the top
OR serge directly over the top

Next:
With a sewing machine: Pin the food catcher flap to the lower side of the front of your bib with the edges tucked under. Sew along the edges of this.

Next:
With a sewing machine:
Pin the front part of the bib (now with the food flap attached) to the terry cloth side, tucking all of the edges inward together. Sew these pieces all together along all the outer edges.
With a serger: Simply put all three pieces of the bib together, exactly like they would look upon completion and serge around all of the edges without tucking them under.

Edges of the bib tucked under, sew over the top about 1/8" from the edge.

Next:
Almost done! Your bib is looking like a bib now you just need to add the closure.
For Velcro: Cut a 2” piece and pin one side to the out part of the bib, and the other piece to the inside (terry cloth) of the neck strap part of the bib.
Carefully sew along the outer edges of the velcro, reinforcing it by sewing over it at least twice.
Snaps are another alternative, but you’ll need a snap press or pliers.

 Attache one piece to the front side of the bib...
 And the other corresponding piece to the back of the neck strap.
Or put snaps on if you have the equipment

Next:
Sit back and admire your finished product or try it on your baby!!

All done and ready to get it dirty!!