I made this a few months ago but I'm finally getting around to posting about it. I wanted something simple, something that looked nice, was easy to wash and take on and off and didn't cost me $30+ to make/buy.
Materials:
2 yards fabric (you'll have some left-overs for other projects)
2 yards coordinating fabric
2 yards of batting (or an old blanket that you don't want anymore...that's what I use)
Thread, sewing machine, scissors
Snaps or velcro
Getting Started:
Wash and dry your fabric, otherwise it'll shrink up and won't fit your crib quite right.
Next, measure your crib. Measure the length of the front, both sides, then make sure to measure exactly how wide you'll need to make the teething guard by measuring from the top of the crib to where you want it to come down to. I wanted mine to be about 6 inches wide. Also, this width needs to be big enough to add a piece of velcro or snap to keep it attached to the crib.
Once you have your measurements you can take your fabric out and start cutting.
The two sides of my crib were 28 inches, the front was 60 inches, and the width I wanted was 6 inches so I doubled that (6 inches for either side) and added an inch to make up for the top thickness of the crib (so 13 inches).
Now take the coordinating fabric that you want on the underside of your teething guard and place it underneath your freshly cut rectangles of coordinating fabric (wrong sides together). Cut this fabric out leaving a one inch margin around every side to allow for the binding/edging.
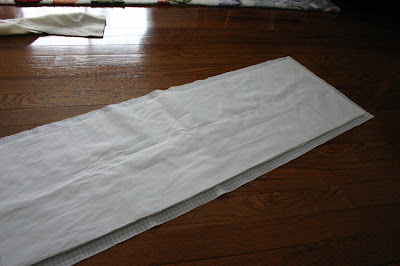
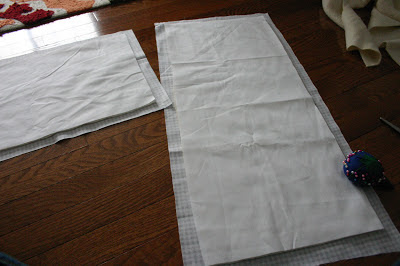
When you are finished, each rectangle should look like this:
 |
| Top fabric (right side up), middle batting, then bottom fabric (right side down). |
You're going to fold the bottom fabric edges in half (right up to the two edges of other fabric) then in half again laying right on top of your top fabric (my white fabric here). Do this along all edges, pinning down, going from right to left...I'll show you why once you get to a corner.
Got to a corner? Good. Here's the easiest way to do the corners...
1. Fold in half, then in half again like you've been doing.
4. And now fold in half one more time, so that the raw edges are all hidden and it lays nicely on top of your three layers of fabric. You should have a nice 45 degree seam in your corner now.
5. Pin this down securely and continue pinning all around the edges and the rest of the corners.
Each of your teething guards should look like this when they're all pinned down. Now, we're ready to sew!
 |
| You can iron down your edges (binding) so they lay flat and will be easier to sew, but it's not a crucial step. |
Sew (straight stitch) right on top of your freshly pinned binding, getting as close to the edge as you can so it lays nicely.
 |
| This is how your corners should look once completed. |
 |
| Voila! The binding is sewn down on all three teething guards and we are now ready for the finishing touch. |
The final step is to add your closures so that the teething guard will actually stay put on the crib. You can do snaps like I did or if you don't have a snap press, do velcro. Super simple. I'm sorry, I forgot to take pictures of this part, so I'll do my best to walk you through it.
For snaps, you'll have to follow the directions that come with your snap press and buy the amount of snaps you'll need. You can purchase a snap press and snaps at Joann Fabrics now and they aren't a bad investment (about $25) if you do little projects like this often.
Measuring:
I chose to add three snaps (or 3 pieces of velcro if you choose) to the two side guards and four to the front one. You'll want to measure and mark each spot where you'd like a snap/velcro so you know where to sew/press it on. Remember to make sure it lines up evenly when you fold your guard in half lengthwise because this is how it will fit on your crib.
Cut squares of velcro in the number you need and measured then pin them in place. Remember to sew it onto the correct spots so your guard is facing the right way when you put it on the crib. With velcro, you'll want to straight stitch slowly around every edge of the velcro so that it won't easily come off of your fabric. Continue sewing all the pieces on until it looks just right.
 |
| Finished crib guard. It fits! |
 |
| From the front |


No comments:
Post a Comment